How to activate UPS calculated shipping?
Table of Content

In the world of e-commerce, providing accurate and reliable shipping options is crucial for maintaining customer satisfaction and trust. One of the most popular and widely used shipping services is UPS (United Parcel Service), known for its efficiency and reliability. For online store owners, especially those using platforms like Shopify, activating UPS-calculated shipping can streamline the checkout process, ensure accurate shipping rates, and ultimately enhance the overall customer experience.
This blog aims to take you through the step-by-step process of activating UPS-calculated shipping for your online store. Whether starting a new one or looking to optimize your existing shipping settings, this comprehensive tutorial will help you provide your customers with precise shipping costs and timely delivery options, making your e-commerce operations smoother and more professional. Additionally, integrating a multi-carrier shipping label app for Shopify can further enhance your store's shipping capabilities by offering flexibility and convenience in managing various shipping services seamlessly.
Prerequisites for Activating UPS Calculated Shipping
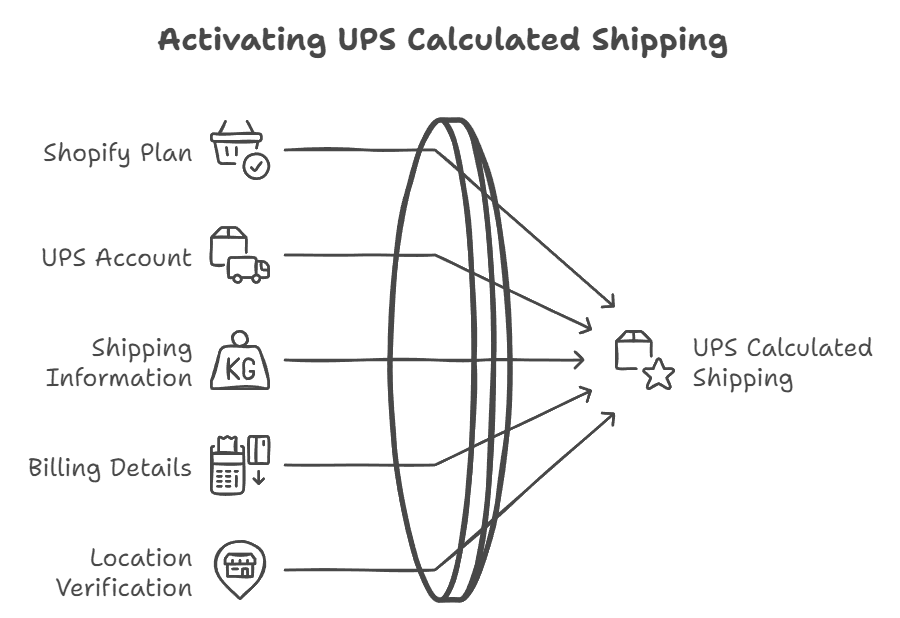
Before you can activate UPS calculated shipping on your Shopify store, ensure you have the following prerequisites in place:
- Shopify Plan:
Make sure you are subscribed to a Shopify plan that supports third-party carrier-calculated shipping rates. This feature is typically available on the Shopify Advanced plan or higher. If you are on a lower plan, you may need to upgrade or add it.
- UPS Account:
You need an active UPS account to integrate their services with your Shopify store. This account will provide you with the necessary credentials to link with Shopify.
- Shipping Information:
Prepare accurate shipping information, including the dimensions and weights of your products. This information is crucial for calculating precise shipping rates.
- Billing Details:
Ensure your UPS account is set up with valid billing information. UPS requires a valid payment method for billing purposes.
- Location Verification:
Verify that your business address is accurate and updated in the UPS system. This helps prevent discrepancies in shipping rate calculations and ensures smooth delivery operations.
How to Activate UPS Calculated Shipping on Your Shopify Store
Following these steps, you can successfully activate UPS calculated shipping on your Shopify store. This will provide your customers with accurate shipping rates based on UPS services and enhance the overall shipping process.
Step 1: Register for a UPS Account
- Visit the UPS Website:
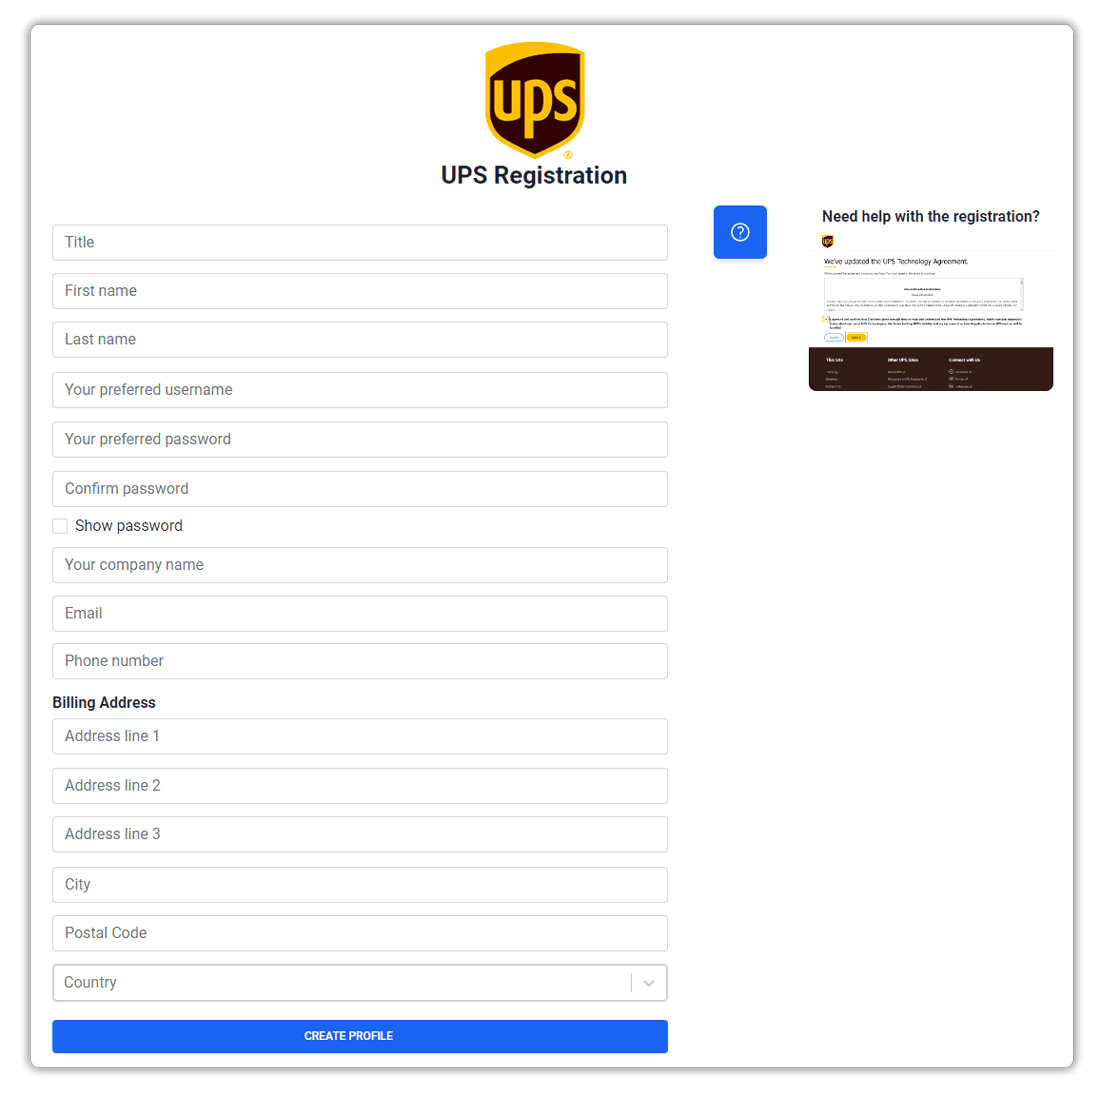
Navigate to the website; find the option to create a new account.
- Provide Business Details:
Enter your business name, address, and contact information.
- Select Services:
Choose the services you want to use, such as shipping, tracking, or billing options.
- Complete Registration:
Verify your information and agree to the terms and conditions.
Step 2: Obtain Your UPS Account Number
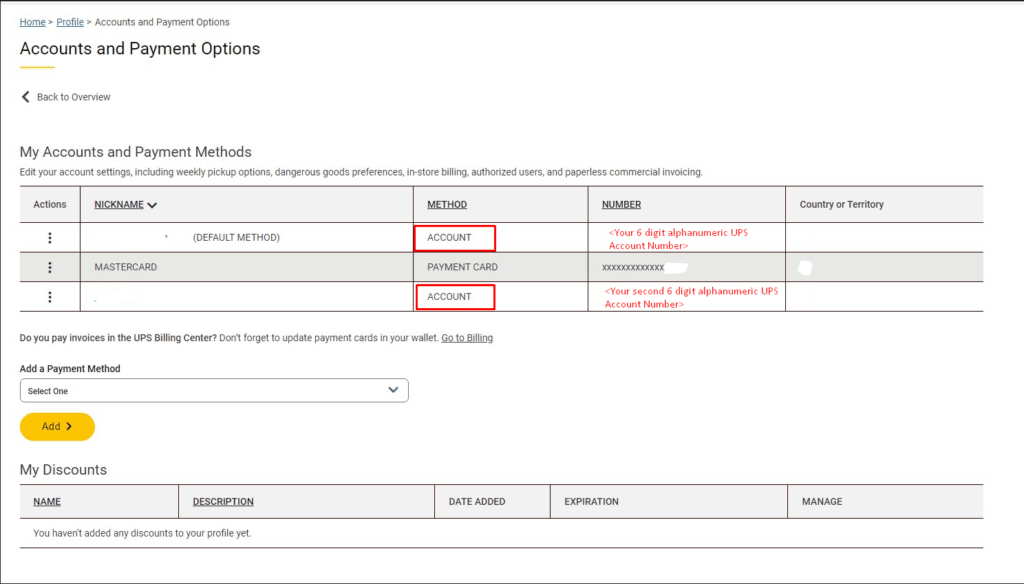
Upon completing the registration, you'll receive a unique UPS account number. This number is essential for integrating UPS services with your Shopify store for calculated shipping. Keep it secure for future interactions with UPS.
Step 3: Verify Your Address
Ensuring your address is accurate and up-to-date in the UPS system is crucial to avoid shipping issues.
- Check UPS Address:
Log into your UPS account and review your address details. Ensure it matches your current address to prevent delivery complications.
- Update Information:
If necessary, navigate to the profile section on the UPS website and update your address information.
- Confirm Changes:
Verify that your address is correctly updated in the UPS system by double-checking the information.
- Sync with Shopify:
Ensure that your verified address information is synced with your Shopify account.
Step 4: Verify Your Invoice
Check your UPS invoice to ensure your account is in good standing and no outstanding issues could impact your shipping capabilities.
Step 5: Connect Your UPS Account to Shopify
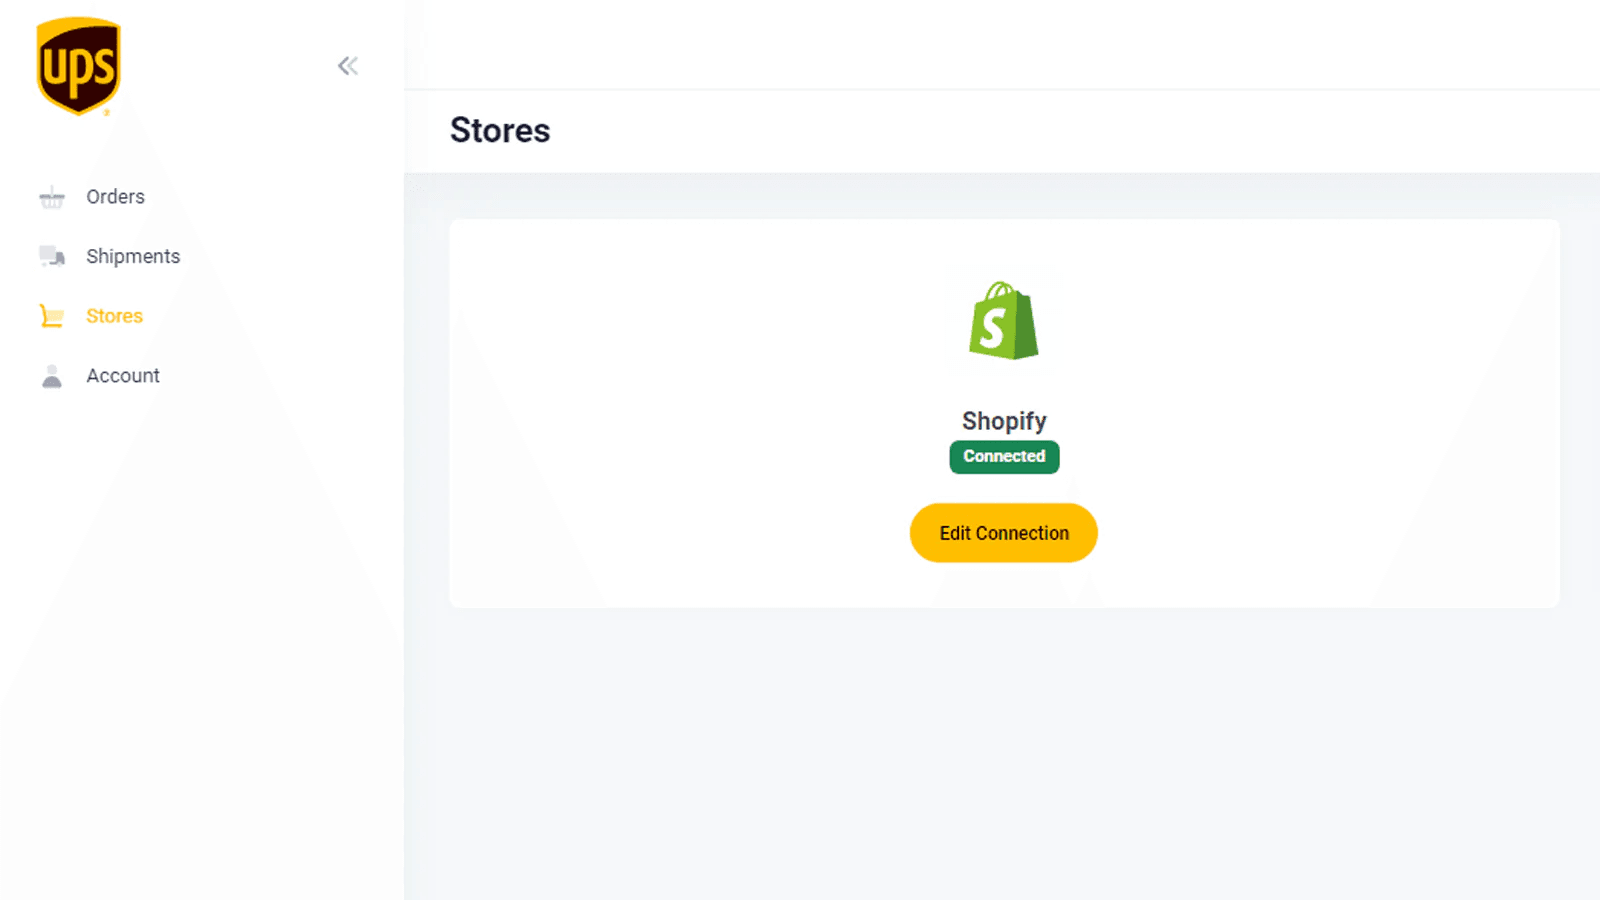
After setting up and verifying your UPS account, connect it to your Shopify store:
- Access Shopify Shipping Settings:
Go to your Shopify store's shipping settings.
- Enter UPS Account Details:
Input the required UPS account details into the designated fields.
Completing these steps means you have successfully activated UPS calculated shipping on your Shopify store, leading to a better shipping experience.
Integrating UPS with Shopify
Integrating UPS with your Shopify store streamlines the shipping process, ensuring accurate UPS shipping rates are applied to customer orders. This integration lets you generate UPS shipping labels directly from your Shopify dashboard, simplifying your shipping operations.
Syncing UPS for Convenience
Syncing your UPS account with your Shopify store offers enhanced convenience. You'll be able to view real-time UPS shipping rates at checkout, providing accurate shipping estimates to customers. This feature improves customer satisfaction by offering transparency and reliability throughout the purchasing process.
Enjoying the Benefits of UPS Integration
Utilizing UPS integration with Shopify brings numerous benefits. These include access to discounted UPS rates, efficient management of various UPS shipping options, and automatic order fulfillment. This cohesive integration enhances your shipping processes, contributing to a positive customer experience.
Enhancing Shipping Efficiency
Connecting your UPS account to your Shopify store significantly boosts shipping efficiency. This integration minimizes manual data entry, reduces the risk of errors in the shipping information, and ensures a smoother fulfillment process. Embracing UPS integration on Shopify optimizes your shipping operations, helping to maintain customer trust and satisfaction.
Activating and Testing UPS Calculated Shipping Rates on Your Shopify Store
Ensuring accurate and reliable shipping costs at checkout is crucial for customer satisfaction. Here's a comprehensive guide to set up and test UPS carrier-calculated shipping rates on your Shopify store:
Setting Up UPS Carrier-Calculated Shipping Rates
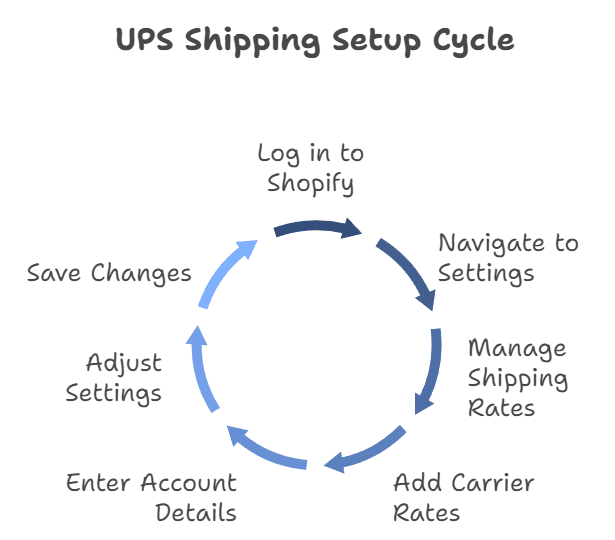
- Log in to Your Shopify Admin Panel:
Access your Shopify admin panel to begin the setup process.
- Navigate to Shipping and Delivery Settings:
Go to the Settings menu and click on shipping and delivery.
- Manage Shipping Rates:
Under Shipping rates, select Manage rates.
- Add Carrier-Calculated Rates:
Click on Add Rate and choose Carrier-calculated rates. From the dropdown menu, select UPS as your carrier.
- Enter UPS Account Details:
Enter your UPS account details for integration with Shopify.
- Adjust Shipping Zones and Parcel Settings:
Configure your shipping zones and parcel settings for accurate rate calculations.
- Save Changes:
Save your changes and prepare for testing the rates.
Testing Your Carrier-Calculated Shipping Rates
- Enable Test Mode in the UPS App:
Activate the test mode feature within the UPS app settings on your Shopify dashboard. This allows you to simulate shipping rate calculations without affecting actual orders.
- Create Test Orders:
Generate several test orders with different product types, weights, and shipping destinations. This helps assess how UPS calculates shipping rates for various scenarios.
- Proceed to Checkout:
Simulate the checkout process for the test orders to see how the UPS carrier-calculated rates are presented to customers. Verify that the shipping costs accurately reflect the products' dimensions, weights, and shipping locations.
- Review Results:
After completing the checkout simulation, review the calculated shipping rates displayed by UPS. Ensure the rates are competitive, accurate, and aligned with your expectations.
- Adjust Settings if Needed:
If you notice any discrepancies or inaccuracies, make necessary adjustments in the UPS app settings or product configurations on Shopify. Fine-tuning these settings ensures precise shipping costs based on UPS calculations.
- Go Live:
Once you've thoroughly tested and validated the carrier-calculated shipping rates, you can confidently make UPS shipping options live on your Shopify store. This enhances customer trust and satisfaction, providing a seamless shipping experience.
Getting Support
If you face any challenges while setting up your Carrier Calculated Shipping with Shopify and UPS, rest assured that you have access to support resources to assist you along the way. Here's how you can get help from both UPS and Shopify:
UPS Support
For issues related to your UPS Shopify integration, you can contact the UPS customer service team:
-
Visit the UPS website; navigate to the support or contact us section.
-
Find the appropriate contact method, which may include phone support, email, or live chat.
-
Clearly explain your issue or query to the UPS support representative for personalized assistance.
Shopify Support
For Shopify-specific inquiries or challenges during the UPS integration process, you can rely on Shopify's dedicated support resources:
-
Log in to your Shopify admin panel.
-
Visit the Help Center or Support section.
-
Explore all the support options, such as live chat, email support, or community forums.
-
Describe your problem or question clearly to receive guidance from Shopify's support team.
By leveraging the support offered by UPS and Shopify, you can streamline your Carrier-Calculated Shipping setup and address any issues promptly and effectively.
How to Deactivate UPS Calculated Shipping
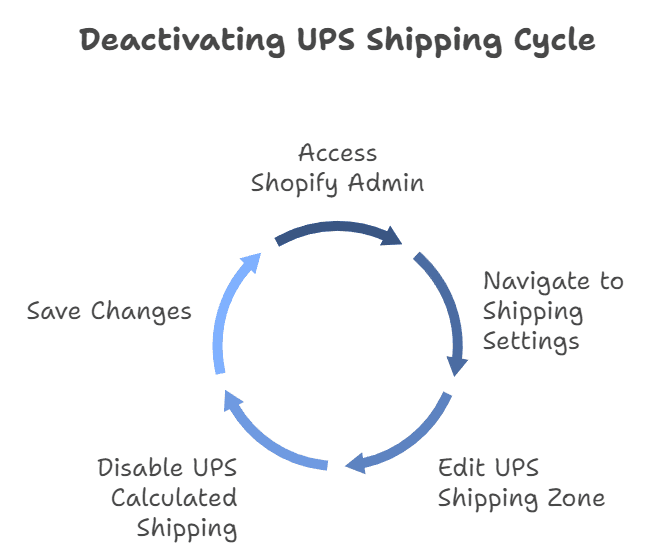
Knowing how to deactivate UPS calculated shipping on your Shopify store is essential, especially if you need to reconfigure your shipping strategy or switch carriers. Here's a step-by-step guide to help you through the process:
- Access Shopify Admin:
Log in to your Shopify account and go to the admin dashboard.
- Navigate to Shipping Settings:
Click on "Settings" in the left corner of the admin dashboard and select "Shipping and Delivery."
- Edit UPS Shipping Zone:
Locate the UPS shipping zone you want to deactivate and click on "Manage rates" next to the zone.
- Disable UPS Calculated Shipping:
Find the UPS calculated shipping feature in the shipping options and toggle it off or delete the UPS rate.
- Save Changes:
Click "Save" to reflect your changes to the data.
By following these steps, you can efficiently deactivate UPS calculated shipping on your Shopify store. Staying informed about how to adjust your shipping settings ensures you can seamlessly adapt to your business needs.
UPS Account Types
Understanding the various UPS account types is crucial for optimizing your shipping processes. Here's a breakdown of the available options:
- UPS Small Business Account:
Ideal for small businesses with infrequent shipments, the UPS account offers discounted rates and no minimum shipping requirements.
- UPS Standard Account:
Suited for businesses with regular shipping needs, it provides access to more features and services.
- UPS Premium Account:
Designed for high-volume shippers, it includes advanced tools, dedicated support, and negotiated rates based on shipping volume.
Choosing the Right UPS Account Type
Selecting the appropriate UPS account type depends on several factors:
- Shipping Volume:
Analyze your shipping frequency and volume to determine the best account type for your needs.
- Budget:
Evaluate your budget constraints to ensure the chosen UPS account type is cost-effective for your business.
- Features & Services:
Review the features and services provided with each account type to determine which best meets your shipping requirements.
By understanding the nuances of UPS account types and selecting the most suitable one, you can optimize your shipping processes and enhance efficiency within your Shopify store with the support of Appracadabra.
Conclusion
Activating UPS calculated shipping on your Shopify store can significantly enhance your shipping process, providing accurate rates and improving customer satisfaction. By following the steps outlined in this guide, you can ensure a seamless integration and operation of UPS services within your e-commerce platform. Additionally, using a multi-carrier shipping label app for Shopify can further streamline your shipping operations.

Thilak
Thilak is the Co-founder & COO at Appracadabra, helping businesses streamline their Shopify app management. His expertise in eCommerce and product development enables him to craft innovative tools that simplify operations and drive growth for online merchants.
