A Step-by-Step Guide to Using Shopify's UPS Shipping Rates Calculator
Table of Content

Providing accurate shipping rates is crucial for maintaining customer satisfaction and optimizing your e-commerce business operations. As an online store owner, you need reliable tools to calculate shipping costs precisely and transparently. Shopify's UPS Shipping Rates Calculator is one such tool that streamlines your shipping process and enhances your customers' shopping experience.
The Importance of Accurate Shipping Rates
Accurate shipping rates are essential for several reasons:
- Building Trust:
Clear and precise shipping costs upfront build trust with your customers. Unexpected shipping charges can lead to cart abandonment and a negative shopping experience.
- Preventing Losses:
Accurate shipping rates prevent potential losses from undercharging or overcharging for shipping. Ensuring that your shipping rates reflect the actual costs helps maintain healthy profit margins and avoid discrepancies that could impact your bottom line.
Shopify's UPS Shipping Rates Calculator
Shopify's UPS Shipping Rates Calculator provides real-time shipping rates directly to your customers during checkout. Integrated seamlessly into the Shopify platform, this calculator leverages UPS's extensive network and reliable shipping services to deliver accurate shipping rates based on package weight, dimensions, destination, and shipping method.
With this calculator, you can offer various shipping options and rates, allowing customers to choose the method that best suits their needs, whether standard ground shipping, expedited services, or international delivery. Appracadabra ensures these features integrate seamlessly with your Shopify store.
Purpose and Benefits of Using the UPS Calculator
The primary purpose of using Shopify's UPS Shipping Rates Calculator is to simplify and automate the process of calculating shipping costs. Here are some key benefits:
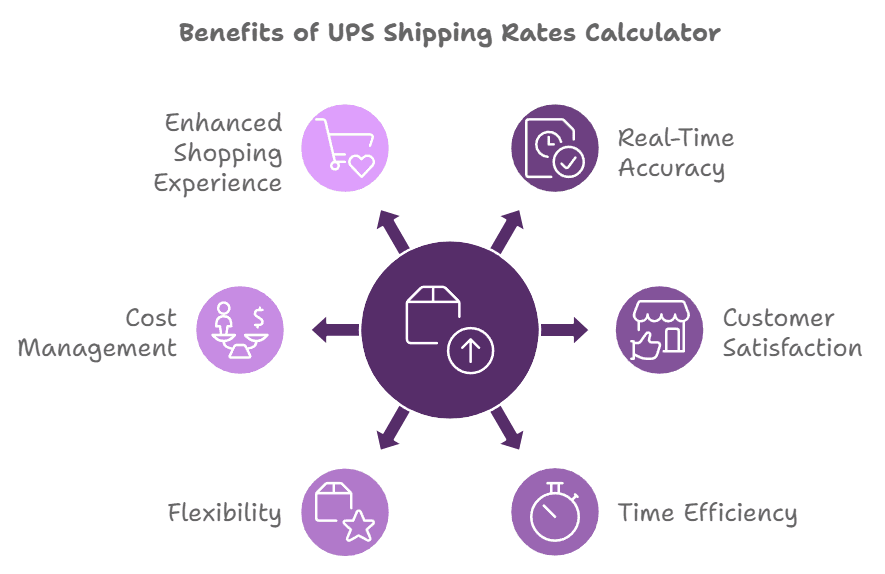
- Real-Time Accuracy:
Provides real-time shipping rates from UPS, ensuring the rates are always current and accurate.
- Customer Satisfaction:
Enhances customer satisfaction and builds trust by offering transparent and accurate shipping rates.
- Time Efficiency:
Saves time for both you and your customers by eliminating the need for manual calculations.
- Flexibility:
Supports various shipping options and methods, catering to customer preferences.
- Cost Management:
Helps manage your shipping expenses effectively by charging the correct shipping fees.
- Enhanced Shopping Experience:
Contributes to a positive shopping experience, encouraging repeat business and customer loyalty.
Getting Started with Shopify's UPS Shipping Rates Calculator
This guide will take you through all the steps involved in setting up and using Shopify's UPS Shipping Rates Calculator to enhance your store's shipping experience.
What is the UPS Shipping Rates Calculator?
The UPS Shipping Rates Calculator is a feature within Shopify that allows merchants to automatically calculate and display real-time shipping rates from UPS at checkout. This tool ensures that the shipping costs are accurate, reflecting the most current rates based on the destination, package size, weight, and shipping method. By integrating this calculator into your Shopify store, you can offer transparent shipping options, which can help build trust and reduce cart abandonment due to unexpected shipping costs.
How UPS Shipping Rates Calculator Integrates with Shopify?
Integrating the UPS Shipping Rates Calculator with your Shopify store is seamless. The platform has built-in support for various Shopify shipping carriers, including UPS, allowing you to connect your UPS account directly to your Shopify admin. Once integrated, the calculator pulls real-time shipping rates from UPS and displays them to your customers during checkout. This integration simplifies the shipping setup and ensures that the rates are always up-to-date, as they are fetched directly from UPS's servers.
Step-by-Step Guide to Using Shopify's UPS Shipping Rates Calculator
Before you can start using the UPS Shipping Rates Calculator, there are a few prerequisites you need to meet:
- Shopify Account:
You must have an active Shopify account. Sign up for a new account on the Shopify website if you don't have one. Ensure your store is set up and you've added the products you intend to sell.
- UPS Account:
You'll need a UPS account to fetch real-time shipping rates. If you don't have a UPS account, you can create one on the UPS website. Once your account is set up, make sure you have your UPS credentials (username, password, and account number) handy, as you'll need these to integrate UPS with Shopify.
Setting Up Your UPS Account
You'll first need to set up a UPS account to take advantage of Shopify's UPS Shipping Rates Calculator. This will allow you to seamlessly integrate UPS shipping rates into your Shopify store, ensuring accurate and real-time shipping costs for your customers.
How to Create a UPS Account
- Visit the UPS Website:
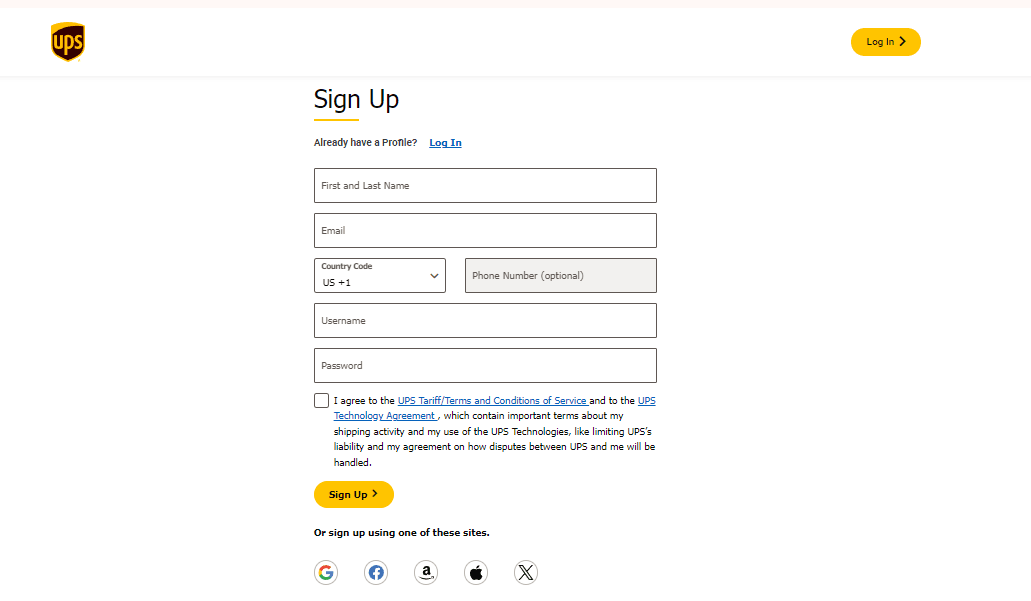
Navigate to the UPS website and click on "Sign Up" in the upper right corner.
- Fill in Your Personal Information:
Enter your name, email address, and a strong and secure password. Use a strong password that you haven't used elsewhere to protect your account.
- Complete Your Profile:
Enter your contact details, phone number, and address.
- Set Up Billing Information:
Add a payment method to cover shipping costs.
- Agree to the Terms and Conditions:
Review the UPS terms and conditions, then check the box to agree.
- Verify Your Account:
UPS will send a verification email to your provided address. The email will help you activate your account.
- Log In to Your Account:
Return to the UPS website and log in with your new credentials.
Linking Your UPS Account with Shopify
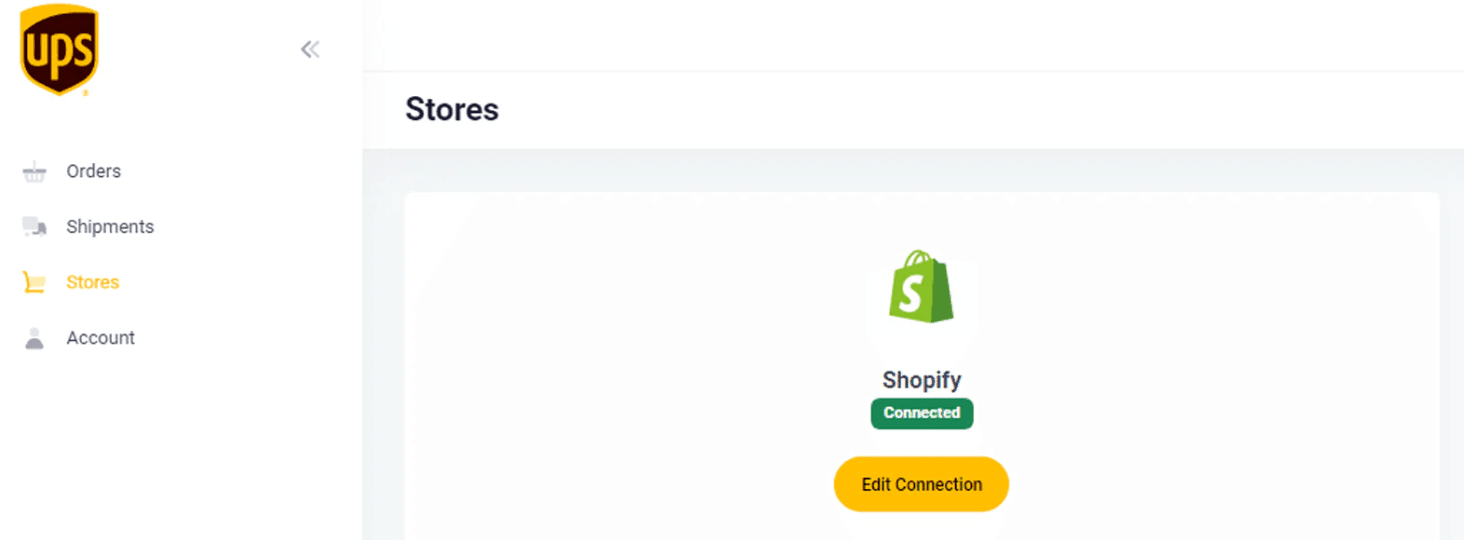
Once your UPS account is set up, the next step is to link it with your Shopify store. This integration will enable you to use the UPS Shipping Rates Calculator directly from your Shopify dashboard.
How to Link Your UPS Account with Shopify
- Log In to Your Shopify Admin:
Access your Shopify admin panel by logging in at shopify.com.
- Navigate to Shipping Settings:
In the admin panel, click "Settings" and click "Shipping and delivery."
- Manage Carrier Accounts:
Scroll down to the "Carrier accounts" section and click "Manage carriers."
- Add UPS as a Carrier:
Click "Add carrier" and select "UPS" from the list of available carriers.
- Enter Your UPS Account Information:
Provide your UPS account number, username, and password.
- Configure Your Shipping Preferences:
Customize your shipping settings, including package sizes, default shipment origins, and service preferences. Save Your Settings: After entering all necessary information, click "Save" to complete the integration.
Verifying Account Integration
Verify that your UPS account is properly integrated with Shopify for smooth operations and accurate shipping rates.
Steps to Verify Account Integration
- Test Shipping Rates:
Go to your Shopify store's checkout process and select a product. Proceed to the shipping options and verify that UPS rates appear correctly.
- Check Order Processing:
Place a test order using a UPS shipping option. Ensure that the order processes smoothly and that shipping details are correctly transmitted to UPS.
- Review UPS Account Activity:
Log in to your UPS account and check for any recent activity related to your test order.
- Contact Shopify Support if Needed:
If you encounter any issues during the integration process, contact Shopify support for assistance.
Configuring Shipping Settings in Shopify
Setting up shipping correctly is crucial for any e-commerce business. Shopify provides a robust platform to manage your shipping needs, including integrating with UPS for real-time shipping rates. Now, we will walk you through configuring your shipping settings in Shopify, adding UPS as a shipping carrier, and customizing your different shipping zones and rates.
Accessing the Shipping Settings in Shopify
- Log in to Your Shopify Admin Panel:
Start by logging in to your account in the Shopify admin panel.
- Navigate to Settings:
You'll find the 'Settings' option on the bottom left of your dashboard. Click on this and access the various settings available for your store.
- Go to Shipping and Delivery:
In the settings menu, click 'Shipping and delivery.' This section allows you to manage all aspects of shipping for your store, including shipping rates, carriers, and delivery methods.
Adding UPS as a Shipping Carrier
- Select Manage Carriers:
In the 'Shipping and delivery' section, look for the 'Manage carriers' option under the 'Shipping' tab.
- Add Carrier:
Click 'Add carrier' to add a new shipping carrier to your store.
- Choose UPS:
From the list of available carriers, select 'UPS.'
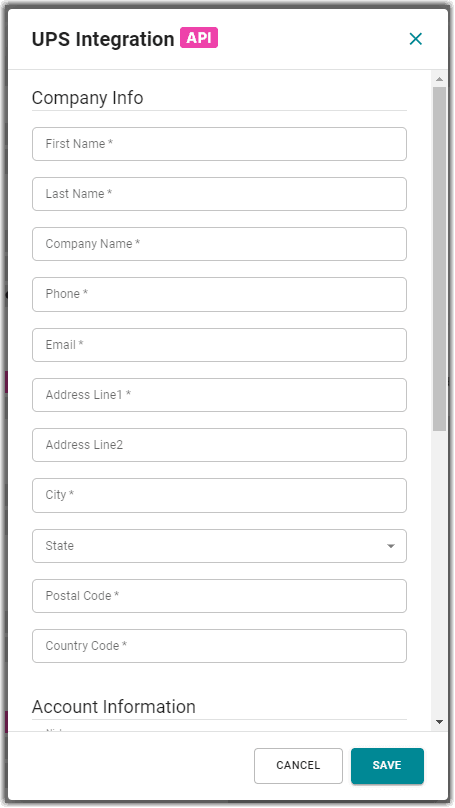
- Enter Account Information:
Provide the necessary information, such as your UPS account number, API key, and other required details.
- Save Settings:
After entering your details, click 'Save' to add UPS as a shipping carrier to your store.
Customizing Shipping Zones and Rates
- Define Shipping Zones:
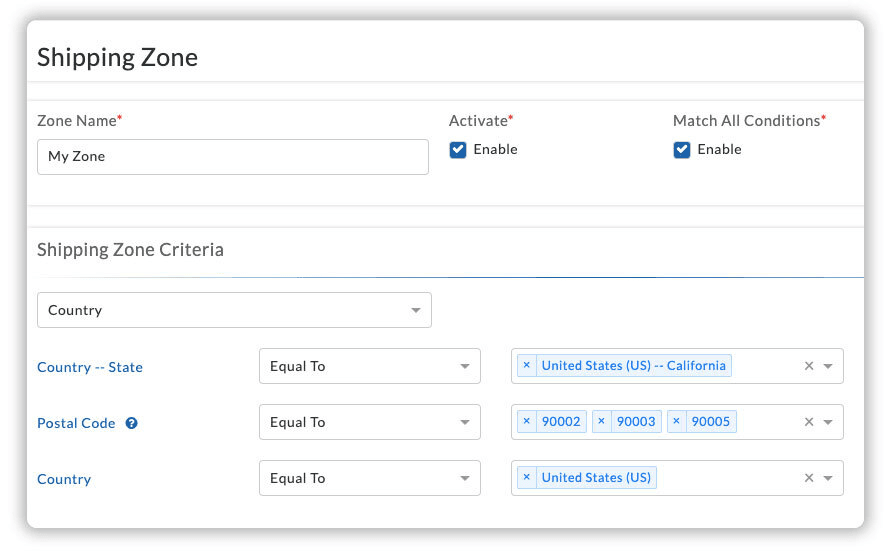
Shipping zones are geographic regions where specific shipping rates apply. To customize these, return to the 'Shipping and delivery' section and click 'Manage rates.'
- Add Shipping Zone:
Click 'Create shipping zone' and name it appropriately (e.g., Domestic, International).
- Select Countries or Regions:
Choose the countries or regions in this shipping zone.
- Set Shipping Rates:
You can set different shipping rates for each shipping zone. Click on 'Add rate' under the shipping zone you've created.
- Choose UPS Rates:
When adding a rate, select 'Use carrier or app to calculate rates,' then choose UPS from the list of carriers.
- Adjust Rate Settings:
You can customize the rate further by adding conditions based on order weight or price.
- Save Changes:
Once you've configured the rates to your satisfaction, click 'Save' to apply these settings to your store.
Inputting Package Details
Shopify's UPS Shipping Rates Calculator can help you determine accurate shipping costs for your products, ensuring you provide your customers with the best possible shipping options. Here's how you input package details into the calculator to optimize your shipping process.
Importance of Accurate Package Details
Accurate package details are crucial for calculating the correct shipping rates. Incorrect or incomplete information can lead to unexpected costs, delays, and dissatisfied customers. Ensuring your package details are precise helps provide transparent pricing, improve customer satisfaction, and avoid additional charges from the carrier.
How to Input Package Dimensions, Weight, and Destination
- Access the UPS Shipping Rates Calculator:
Log in to your Shopify admin panel, navigate to 'Settings,' then 'Shipping and Delivery.' Under the 'Carrier Calculated Shipping Rates' section, select 'UPS.'
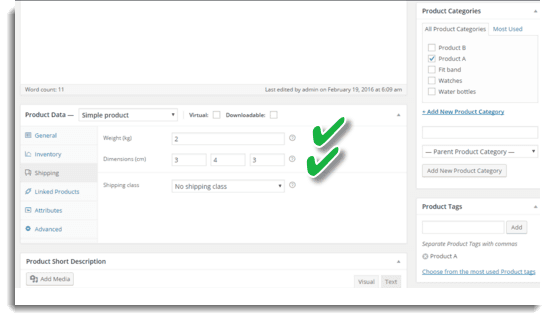
- Enter Package Dimensions:
Input the length, width, and height of your package. Accurate dimensions are essential as carriers calculate shipping rates based on package volume.
- Add Package Weight:
Input the weight of your package. Use a reliable scale to ensure the weight is accurate.
- Specify the Destination:
Provide the destination address, including the country, state, and postal code.
- Review and Confirm:
Double-check all the details you have entered before proceeding.
Tips for Optimizing Package Details to Reduce Shipping Costs

- Choose the Right Packaging:
Select packaging that fits your product snugly.
- Consolidate Shipments:
Combine multiple items into one shipment.
- Use Flat Rate Boxes:
Take advantage of UPS flat rate boxes for shipping items of similar sizes and weights.
- Negotiate Shipping Rates:
If you ship in high volumes, consider negotiating rates with UPS.
- Leverage Shopify Shipping Discounts:
Make sure to use Shopify's discounted shipping rates with UPS.
- Review and Update Regularly:
Periodically review and update your package details and shipping strategies.
Step-by-Step Guide to Using the Calculator
Accurate shipping rates help maintain transparency with your customers and ensure that you cover your shipping costs effectively. Shopify's UPS Shipping Rates Calculator simplifies this process, allowing you to provide precise shipping rates at checkout.
Access the Shipping Settings:
-
Log in to your Shopify admin panel.
-
Navigate to 'Settings' at the bottom left corner of the dashboard.
-
Click on 'Shipping and Delivery'.
Add a Shipping Zone:
-
In the 'Shipping and Delivery' section, locate the 'Shipping' section.
-
Click 'Manage rates' next to the shipping profile you want to edit.
-
Click 'Create shipping zone' and enter a name for the zone.
-
Select the countries you want to add to this zone.
Add UPS as a Carrier:
-
Click 'Add rate' within the 'Shipping from' section within the created shipping zone.
-
Select 'Use carrier or app to calculate rates.'
-
Choose UPS from the list of available carriers.
Configure the UPS Settings:
-
Enter your UPS account details if prompted, or sign up for a new account.
-
Configure your preferred settings, such as package type, pickup/drop-off options, and insurance preferences.
Set Up Package Dimensions and Weight:
-
Enter the default package dimensions and weight for the products you will be shipping.
Save and Test:
-
Save and go to your storefront to test the checkout process.
-
Add one or two products to the cart, proceed to checkout, and verify that the UPS shipping rates are being displayed correctly.
Understanding the Different Rate Options Provided by UPS
UPS offers a variety of shipping rate options to accommodate different needs and preferences. These include:
- UPS Ground:
An economical choice for non-urgent deliveries within the contiguous United States.
- UPS 2nd Day Air:
A faster option for delivery within two business days.
- UPS Next Day Air:
The quickest option for urgent deliveries by the next business day.
- UPS Worldwide Expedited:
An international shipping option with a balance of speed and cost.
- UPS Worldwide Express:
An expedited international option for quick deliveries.
Choosing the Best Shipping Rate for Your Needs
Selecting the right shipping rate involves balancing cost, speed, and reliability. Here are some tips to help you choose the best option:
- Understand Your Customer Base:
Analyze your customers' preferences.
- Consider the Value of the Items:
Opting for faster and more reliable shipping options with insurance might be prudent for high-value items.
- Evaluate the Destination:
Domestic shipments may benefit from economical options like UPS Ground, while international shipments might require faster options like UPS Worldwide Express.
- Factor in Your Business Model:
If your business promises quick deliveries, investing in faster shipping options will help ensure customer satisfaction and uphold your brand promise.
Implementing and Managing Shopify Shipping Rates
To get started with Shopify's UPS Shipping Rates Calculator, follow these steps:
Activate UPS Shipping on Shopify:
-
Go to your Shopify admin panel.
-
Navigate to Settings > Shipping and Delivery.
-
In the "Shipping" section, click on Manage rates.
-
Scroll down to "Shipping from" and click on Add rate.
-
Select Carrier and app rates and choose UPS from the list.
-
Click Continue to configure your UPS account details.
Configure Shipping Zones:
-
Select the regions or countries where you want to offer UPS shipping.
-
In the "Shipping zones" section, click on Create shipping zone.
-
Name your shipping zone and select the countries or regions included.
-
Add the UPS rate to this zone by clicking Add rate, selecting Use carrier or app to calculate rates, and choosing UPS.
Set Up Shipping Rate Adjustments:
-
You can add handling fees or discounted rates to your shipping cost.
-
Click Edit next to the UPS service you want to adjust.
-
Enter a percentage or fixed amount in the "Rate adjustments" field.
Applying the Calculated Rates to Your Products
Once you've set up the UPS Shipping Rates Calculator, you need to apply these rates to your products:
Assign Shipping Profiles:
-
Go to Settings > Shipping and Delivery.
-
Click Manage Rates under "Shipping" and select Shipping Profiles.
-
Create a new shipping profile if necessary, or edit an existing one.
-
Add your products to this profile by clicking Add Products and selecting the items you want to include.
Select UPS Rates:
-
Within the shipping profile, click Add Rate under the appropriate shipping zone.
-
Choose Use carrier or app to calculate rates and select UPS.
-
Ensure that the correct UPS services are checked.
Save Changes:
Review the settings and click Save to apply the rates to your selected products.
Managing Shipping Rates for Multiple Products
Managing shipping rates for multiple products can be streamlined by using shipping profiles and bulk editing:
Bulk Edit Shipping Profiles:
-
Navigate to Settings > Shipping and Delivery.
-
Click Manage Rates and select the shipping profile you want to edit.
-
Use the Bulk editor tool to add or remove products from the profile.
Apply UPS Rates to Multiple Products:
-
In the shipping profile, ensure that UPS rates are set up correctly for each shipping zone.
-
Use the bulk editor to update the shipping options for multiple products simultaneously.
Automate Shipping Rules:
Consider using UPS Shopify app like Advanced Shipping Rules to automate the assignment of rates for shipping based on the weight of the product, its price, or category.
Updating Rates as Needed
It's essential to keep your shipping rates up-to-date to reflect changes in carrier pricing and ensure customer satisfaction:
Monitor Carrier Rate Changes:
-
Regularly check for updates from UPS regarding rate changes.
-
Adjust your Shopify settings to reflect these changes by navigating to Settings > Shipping and delivery > Manage rates and editing the relevant UPS rates.
Review and Adjust Rate Adjustments:
-
Periodically review your rate adjustments (handling fees or discounts).
-
Ensure they still align with your business strategy and customer expectations.
Test New Rates:
-
Before making changes live, test new rates to ensure accuracy.
-
Use Shopify's order preview feature to see how the new rates will be applied to customer orders.
Best Practices for Using the Calculator
Using Shopify's UPS Shipping Rates Calculator efficiently can streamline shipping and ensure cost-effectiveness. Follow these best practices:
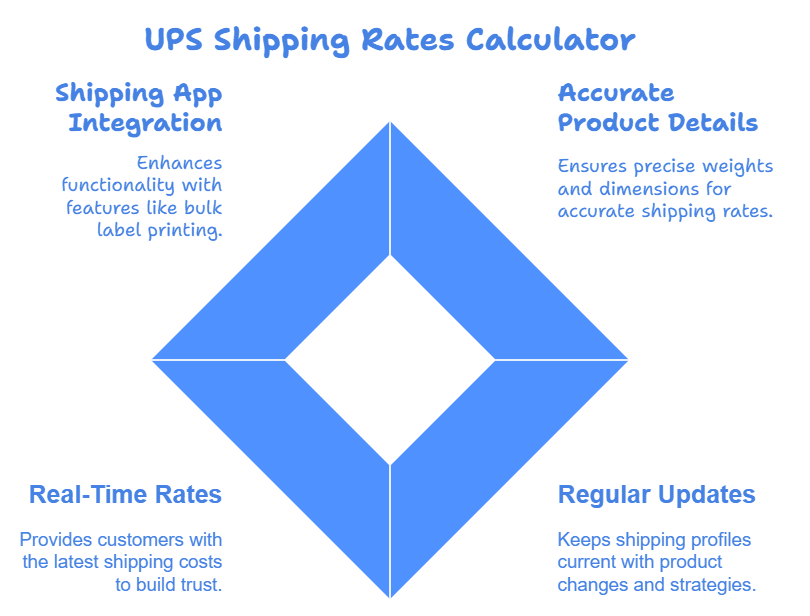
- Accurate Product Details:
Enter precise weights and dimensions for all products in Shopify for accurate shipping rates
- Regular Updates:
Regularly review and update your shipping profiles to reflect any product changes or shipping strategies.
- Real-Time Rates:
Enable real-time shipping rates to provide customers with the most current shipping costs, building trust and reducing cart abandonment.
- Shipping App Integration:
Integrate with a shipping app that supports UPS for features like bulk printing of shipping labels and automatic tracking updates.
Tips for Maintaining Accurate Shipping Rates
Accuracy in shipping rates is crucial for both business and customer satisfaction. Use these tips:
- Audit Shipping Costs:
Periodically check your shipping costs against customer charges to identify discrepancies and adjust rates.
- Include Packaging Materials:
Ensure packaging materials' weight and dimensions are included in the calculator to avoid undercharging.
- Stay Informed:
Stay updated on UPS rate changes by subscribing to updates or regularly checking their website.
- Test Shipping Scenarios:
Test different shipping scenarios to understand how various factors affect your shipping costs.
Strategies for Reducing Shipping Costs
Reducing shipping costs can improve profit margins and offer better rates to customers. Consider these strategies:
- Negotiate Rates:
If you ship large volumes, negotiate with UPS for better rates.
- Flat-Rate Shipping:
Evaluate if flat shipping rates are more cost-effective than weight and dimension-based rates for specific products.
- Optimize Packaging:
Use appropriately sized packaging to avoid increased costs due to dimensional weight pricing.
- Consolidate Shipments:
Consolidate shipments to reduce the number of packages sent, lower overall costs, and be more eco-friendly.
Monitoring and Adjusting Rates Over Time
Shipping rates fluctuate; monitoring them can help you stay competitive. Use these tips:
- Set Review Intervals:
Review shipping rates and policies regularly (e.g., quarterly) to ensure they remain competitive and aligned with costs.
- Analyze Data:
Use Shopify's reporting tools to analyze shipping data and optimize rates based on trends like common destinations and package sizes.
- Adjust for Seasons:
Account for seasonal variations in shipping costs, such as higher rates during holidays.
- Customer Feedback:
Solicit and use customer feedback to improve shipping experiences and reduce costs.
Conclusion
Incorporating Shopify's UPS Shipping Rates Calculator into your e-commerce store is a powerful way to enhance operational efficiency and customer satisfaction. You earn the trust of your customers and streamline your shipping processes by providing accurate, real-time shipping rates. Embracing this tool ensures you offer transparent, competitive shipping options, ultimately contributing to a smoother, more reliable shopping experience. As you continue to refine your shipping strategy, leveraging the full capabilities of this calculator will help your business maintain healthy profit margins and keep your customers coming back for more.

Thilak
Thilak is the Co-founder & COO at Appracadabra, helping businesses streamline their Shopify app management. His expertise in eCommerce and product development enables him to craft innovative tools that simplify operations and drive growth for online merchants.
